artsen
Blurred Lines: Unmasking the Hidden Dangers of Image Redaction
When it comes to image redaction, a “quick and dirty” blur or pixelation might seem like the way to go—but as we’ll see, these techniques have security vulnerabilities that a determined attacker can exploit. In this post, we’ll not only dive deep into image obfuscation techniques like blurring, pixelation, and opaque overlays but also explore how developers can implement these methods using actual Python image processing code with OpenCV. We’ll also touch on how some of these redaction techniques can be reversed, demonstrating why relying solely on them might not be cybersecure.
The Importance of Secure Image Redaction
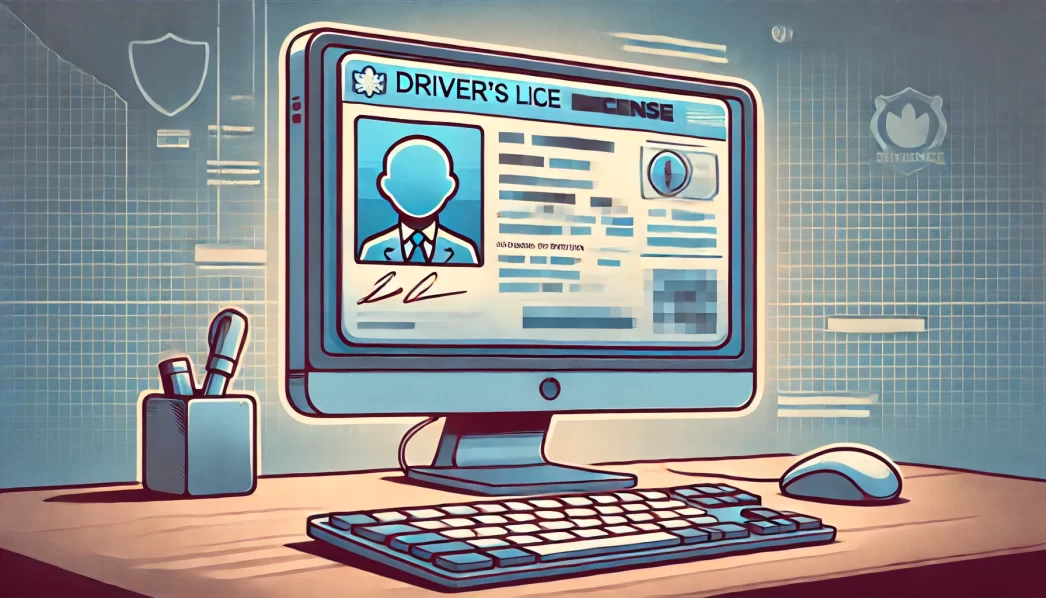
Redacting sensitive information from images is crucial for data privacy, preventing identity theft, and stopping information leaks. Whether it’s blurring faces in surveillance footage, censoring legal documents, or anonymizing personal identifiers like social security numbers and credit card details, choosing the right redaction method is essential. However, many commonly used redaction techniques are not as secure as they seem.
Common Uses of Image Redaction
- Protecting Personally Identifiable Information (PII): Names, addresses, phone numbers, and other sensitive data in documents.
- Censoring Confidential Content: Hiding parts of legal contracts, medical records, or financial documents.
- Obscuring Faces in Surveillance: Ensuring privacy protection in publicly shared CCTV footage, social media images, and videos.
Now, let’s break down why traditional image redaction techniques like blurring and pixelation can be easily reversed.
Blurring: The Not-So-Safe Redaction
How Blurring Works
Blurring techniques work by applying a smoothing filter, such as a Gaussian blur, over a region. It functions by averaging pixel values over a certain radius, reducing clarity but not removing the underlying data. Since it’s a low-pass filter, the original data isn’t deleted—it’s just distorted. If an attacker knows the blur kernel, they might use deconvolution algorithms to reverse the blur or approximate the original content.
Example: Blurring a Region with OpenCV
Here’s a Python code snippet that demonstrates how to blur an image using OpenCV:
import cv2

# Load the image
image = cv2.imread('sensitive_image.jpg')

# Coordinates for the region to blur (x, y, width, height)
x, y, w, h = 100, 50, 200, 100

# Extract the region of interest (ROI)
roi = image[y:y+h, x:x+w]

# Apply Gaussian blur to the ROI
blurred_roi = cv2.GaussianBlur(roi, (51, 51), 0)

# Replace the original ROI with the blurred ROI
image[y:y+h, x:x+w] = blurred_roi

# Save the redacted image
cv2.imwrite('redacted_image_blur.jpg', image)
While this might look visually secure, Gaussian blur can be reversed using deblurring techniques.
Pixelation: When Blurring Isn’t Enough
How Pixelation Works
Pixelation techniques lower an image’s resolution by replacing small pixel clusters with a single average color. The idea is that reducing detail makes text or faces unreadable. However, machine learning models can be trained to restore pixelated images, often with surprising accuracy.
Example: Pixelating a Region with OpenCV
Below is a Python script that demonstrates how to pixelate an image:
import cv2

# Load the image
image = cv2.imread('sensitive_image.jpg')

# Coordinates for the region to pixelate (x, y, width, height)
x, y, w, h = 100, 50, 200, 100

# Extract the region of interest (ROI)
roi = image[y:y+h, x:x+w]

# Resize down to pixelate (e.g., reduce resolution to 10x5)
temp = cv2.resize(roi, (10, 5), interpolation=cv2.INTER_LINEAR)

# Resize back to original size
pixelated_roi = cv2.resize(temp, (w, h), interpolation=cv2.INTER_NEAREST)

# Replace the original ROI with the pixelated ROI
image[y:y+h, x:x+w] = pixelated_roi

# Save the redacted image
cv2.imwrite('redacted_image_pixelate.jpg', image)
While pixelation makes sensitive data harder to read, attackers can use AI-based super-resolution models to recover important details.
The Vulnerability: Unblurring and Unpixelating Techniques
Why Blurring and Pixelation Are Not Foolproof
While blurring and pixelation obscure details, they do not erase the underlying data. The original information still exists in a modified form, and advanced computational techniques can reconstruct it with surprising accuracy. Attackers leverage deconvolution algorithms, super-resolution models, and deep learning neural networks to reverse-engineer redacted images.
Deconvolution and Unblurring
Deconvolution algorithms attempt to reverse a blur effect by estimating the blur function and restoring the original details. If an attacker knows the blur kernel (or can estimate it), they can use mathematical models to recover the original content.
Here’s an example of applying Wiener deconvolution in Python:
import numpy as np
from scipy.signal import wiener
import cv2

# Load the blurred image
blurred = cv2.imread('blurred_roi.jpg', cv2.IMREAD_GRAYSCALE)

# Apply Wiener deconvolution with an estimated kernel size
deblurred = wiener(blurred, mysize=(5,5))

# Save the deblurred image
cv2.imwrite('deblurred_roi.jpg', deblurred)
If the blur strength is low, techniques like Richardson-Lucy deconvolution can further improve clarity.
from skimage import restoration

# Apply Richardson-Lucy deconvolution
deblurred_rl = restoration.richardson_lucy(blurred, np.ones((5, 5))/25, iterations=30)

cv2.imwrite('deblurred_rl.jpg', deblurred_rl)
Super-Resolution for Reconstructing Pixelated Data
Super-resolution models powered by deep learning can enhance pixelated text and images, making them readable again. Pre-trained SRCNN (Super-Resolution Convolutional Neural Network) and ESRGAN (Enhanced Super-Resolution GAN) models can restore fine details from heavily pixelated images.
Example using OpenCV’s DNN-based super-resolution:
import cv2

# Load pixelated image
image = cv2.imread('pixelated_image.jpg')

# Load a pre-trained super-resolution model
sr = cv2.dnn_superres.DnnSuperResImpl_create()
sr.readModel("EDSR_x4.pb")
sr.setModel("edsr", 4)

# Upscale the pixelated image
restored_image = sr.upsample(image)

cv2.imwrite('restored_image.jpg', restored_image)
These methods demonstrate that redaction techniques relying on image distortion can be reversed, exposing private data.
More Robust Alternatives: Secure Image Redaction
1. True Deletion
The safest method is to completely remove the sensitive data from an image, ensuring no recoverable traces remain.
import cv2
import numpy as np

# Load the image
image = cv2.imread('sensitive_image.jpg')

# Define the region to remove
x, y, w, h = 100, 50, 200, 100

# Replace the region with a solid color (e.g., black)
image[y:y+h, x:x+w] = np.zeros((h, w, 3), dtype=np.uint8)

cv2.imwrite('redacted_image_delete.jpg', image)
2. Using Opaque Overlays
Placing a solid rectangle over sensitive data ensures the original pixel data is fully removed.
import cv2

# Load the image
image = cv2.imread('sensitive_image.jpg')

# Define the region for the opaque overlay
x, y, w, h = 100, 50, 200, 100

# Draw a filled rectangle over the region
cv2.rectangle(image, (x, y), (x+w, y+h), (0, 0, 0), thickness=-1)

cv2.imwrite('redacted_image_overlay.jpg', image)
Conclusion
By choosing the right image redaction techniques, developers can ensure sensitive information remains secure. Avoiding blurred or pixelated redaction in favor of true deletion or opaque overlays significantly reduces privacy risks.
By implementing secure image redaction techniques, developers can prevent data leaks, identity theft, and cybersecurity breaches.